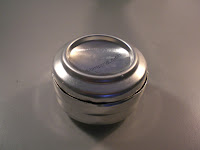
 So I've discovered the secrets of the penny stove and there were several things I don't know about prior to my test on Tuesday.
First of all, I should have know the mechanics of the stove prior to lighting. That should go without saying for all projects but often can take some of the fun out of it. Anyway, the stove works using the can to direct the flow of heat and pressure of the fuel and its vapors. To that end, the penny acts as a valve. When it is sitting at normal state the penny creates enough tension so that the fuel doesn't drain into the cup allowing you to light it. Once lit, the flame heats up the aluminum burner, fuel cup, and liquid fuel. Due to the differences between the aluminum and copper (or zinc, I should say), the heated aluminum creates a space between the penny and the burner allowing the now-heated fuel to slip down into the cup. The fuel boils in the cup, vaporizes, and presses out the path of least resistance which is through the keys on the outer ring of the burner. As the vapor sprays out of the keys it comes in contact with the lit priming fuel and combusts.
 Knowing that, I now know what was going wrong beyond having the wrong materials. First was that I was filling up the fuel cup with and also the center of the burner, but what I should have been doing was leaving the penny in place to keep the fuel out of the cup and filling up the center to the point were the fuel spills over the lip and covers the jet holes. This does two things - heats the fuel cup better and retains some lit fuel on the edges of the stove to ignite the jets as they start spraying gas.
Having found out how the stove works and how to light it, I made sure to get some denatured alcohol (because pure grain alcohol is illegal in this state - figures) and I also wanted to find something out of which to build my pot stand. I found exactly what I'd been looking for at my trusty ACE hardware. Denatured alcohol is basically pure alcohol with additives that render it undrinkable but it's used as a solvent. I also found some metal skewers
 with rings at the end. I cut them into a tripod like the directions indicated. But before I did that I tried to make a cool cylindrical lattice of wire from the end of a cheap whisk. It didn't work out very well because I didn't bend them all the same way which made it difficult to line up in the end. It also was not sturdy enough to hold my pot so I smashed it with a hammer and tried again with much improved results. Take a look. All I really need now is a wind shield and I'm good to go. Can't wait to try this out for on the trail.


No comments:
Post a Comment